Posts

Showing posts from 2012

Christmas 2012 at The Curve Mall

Image
In the month of December Ikea is running some one-day special Christmas offer of 2 items per day everyday till December 24. We were attracted or rather distracted by one of the items on offer that day but felt it more of a want than a need. Whimsie Forest with a sprinkle of fairy dust is the Curve Mall 2012 Christmas theme decoration.    --     camera: Olympus Pen E-PL2, Lens: Olympus M.Zuiko Digital 14-42 mm f/3.5-5.6 II standard zoom, setting lens at 28mm, f/9.0, 1/15s and ISO 1000. Physically checking  out the item might help but Ikea is quite a distance from our place. If the item turned out to be something not what we really want,  it would be a wasted day out.  Then I remembered the Christmas decoration at The Curve so I said to my wife at least we can shoot some photos to make it worth the while. We arrived at Ikea around lunch time and had lunch at the Oriental Court area at The Curve Mall. After that we mov...

Bedazzling Christmas at Pavilion Kuala Lumpur

Image
Before we knew it Santa is back singing out loud " HoHoHo I am Back"! Christmas 2012 is just days away and many shopping Malls already decorated with beautiful Christmas theme to draw shoppers and visitors in. A week ago we saw the almost completed Christmas decoration at The Curve mall but we had no photos because it was not lighted yet at that time. A Bedazzling Christmas is the 2012 Christmas theme for Pavilion Kuala Lumpur with plenty of crystals, glittering gold and blinking lights on the Christmas tree. — Camera: OLYMPUS PEN E-P1, LENS: M.ZUIKO DIGITAL 17MM F/2.8 pancake lens, SETTING F/4.0, 1/15s and ISO 200. We were at the Bukit Bintang area running some chores and decided to drop by the Pavilion Kuala Lumpur for lunch. The Pavilon Mall 2012 Christmas decoration looked more vibrant and upbeat than what we remembered last December. The theme for 2012 is Bedazzling Christmas. Visitors entering Pavilion Mall from the Bukit Bintang entrance can never miss...

Easy Manual Exposure Blending with The Gimp

Image
We talked about a simplified and easy 2 layers exposure blending in the last article and so here it comes. In most scenes the dynamic range of the scenes are just slightly out of range of the image sensors' dynamic range.  Therefore, we only need to extend the highlight or shadow area by about 2  to 3 stops and the 2 layers blending method can handle that easily. This image of the The Western Courtyard of The Curve Mall created using the 2 layers manual exposure blend with The Gimp was fast and reasonably good. -- Camera: Olympus Pen E-P1, Lens: M.Zuiko Digital 14-42 mm f/3.5-5.6 II standard zoom, setting lens zoom at 31mm and f/4.9, ISO 200. The shutter speed of the two blended images are 1/15s and 1/60s. In this 2 layers method we use the +1 EV and the -1 EV photos from the three bracketed images. The 0 EV or "normal exposed" image from the camera is not required here. The +1 EV overexposed image has enough details to cover most of the scenes from t...

Manual Exposure Blending

Image
We saw a nice scene where the sun was shining brightly in deep blue sky and colourful flowers in the foreground contrasting beautifully with the buildings in the background. We took a shot and what we got was a well exposed building with overly dark flowers in deep shadows and a pale featureless white sky. A total letdown!  The beautiful high contrast scene was not represented on the photo we took so we became frustrated and disappointed with our camera. The problem is the tonal and contrast range of the scene is too large for the imaging sensor in the camera to capture. We had the same situation when we were at the Western Courtyard of The Curve mall.  In the center we had natural sunlight streaming in from the top of the open courtyard surrounded by a darkened but clearly visible dining area, leading towards the courtyard were rows of hanging incandescent lamps in beautiful orange glow. However it was all lost with the photo we took - only the beautiful pil...

Macro Photography and Macro Converter

Image
Close-up and Macro Photography is a popular category with many photographers. Some of the reasons being macro photographers don't need to look for the right models with well equipped studio, or travel to exotic far away places. However that was always the dream and aspiration of many photographers. Macro photographers are also unlikely to land themselves into some sticky controversy spot with the authority. Several renowned photographers had mentioned in interviews and talks that they find serenity and contentment within themselves when they are engrossed with macro and nature photography. The close-up of these blue flowers complimenting with the green background in a low angle view point made this photograph look abstract and artsy.  --   Camera: Olympus Pen Lite E-PL2. Lens: M.Zuiko ED 40-150mm 1:4.0-5.6 telephoto lens and MCON-P01 macro converter. Setting lens zoom at 70mm and f/5.0 1/200s and ISO 2 It is easy to get started with Macr...

Olympus MCON-P01 Macro Converter date with the Damselfly

Image
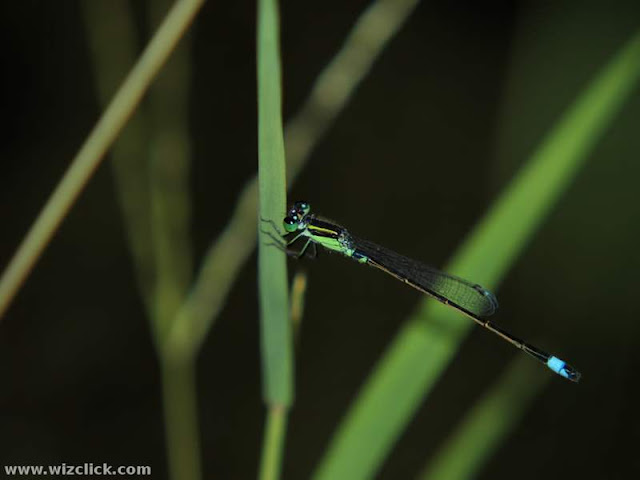
The Olympus MCON-P01 Macro Converter is an add-on close-up lens designed to pair with the standard kit zoom M.Zuiko digital 14-42 F/3.5-5.6 II and also the newer kit zoom with (R) designation. However better results are obtained with this macro converter when paired with either the M.Zuiko digital 40-150 ED F/4.0-5.6 telephoto zoom or the M.Zuiko Digital 14-150 ED F/4.0-5.6 wide-angle to telephoto zoom as the master lenses. The MCON-P01 is a very light weight macro converter at just 23 grams and is fully made of plastic. The feather weight of the MCON-P01 macro converter means there will be no load issue when mounting on the equally light weight M.Zuiko zoom lens. Certainly no stress to the master lens' micro focusing motor and the light-weight mechanism. Damselfly belong to Odonata subgroup of insect which also include the dragonfly. Odonata are ancient insect. fossils of dragonfly had been trace to predated the dinosaur era. -- Camera: Olympus Pen Lite E-PL2, Le...

An exercise with OM Zuiko 135mm F/2.8 on Pen E-P1

Image
After taking some photos around noon in the open I decided to take shelter from the blazing sun. Sitting at a shaded corner taking a break and drinking some water to cool myself down,  I started checking out the images taken on the Olympus Pen E-P1.  It was then that I remembered the OM Zuiko 135mm F/2.8 lens was in my camera bag. The OM Zuiko 135mm F/2.8 lens was one of the lens in my collection that I rarely used during my OM 35mm film days. I tended to reach for the Tamron SP 90MM F/2.5 for portrait or the OM 200mm F/4 for telephoto usage. The OM 135mm F/2.8 lens happened to be somewhere in between the other two lenses. After reading some positive on-line user experience on the OM 135mm lens I decided to try it out on my Pen E-P1 camera. A 135mm focal length lens on a Micro Four Thirds camera is equivalent to a 270mm lens on the OM camera or 35mm format camera. 270mm EFL (Equivalent Focal Length) is not an easy focal length to handhold or to manual ...

Japanese Koi and Russian Industar 61L/Z 50mm F/2.8 lens

Image
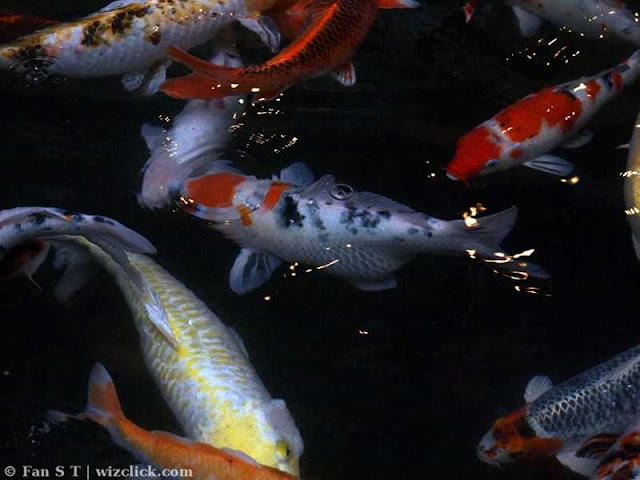
Koi is the Japanese word for carp fish. However in English the word Koi normally refers to "nishikigoi" the domesticated colourful ornamental carp fish that originated from Japan. Nishikigoi (錦鯉) literally means brocaded carp fish. This large aquarium illuminated with overhead spot-lights that enhance the metallic colour of the koi and add interesting sparkle to the ripple on the water surface. -- Camera: Olympus Pen E-P1, Lens: Zenit Industar 61L/Z 50mm F/2.8, set at F/5.6 and 1/250 second at ISO 800. Koi fish is a very popular decorative fish especially in the Far East. To the Japanese Koi fish symbolises perseverance, endurance and the strength to overcome difficulties in life. The word Koi also pronounced the same as another Japanese word meaning love and friendship. The Chinese character for fish is pronounced the same as the word for 'surplus' or 'abundance' and symbolises profit, gain and good fortune. Carp fish is a popular theme in Chinese...

Three Wise Monkeys

Image
I have some photos of Nikko Tosho-gu Shrine  a UNESCO world heritage site located in Nikko, Japan. This is the shrine with the three Mizaru, Kikazaru, Iwazaru -- the orignal Sanzaru wood carving on the top of the stable building. That is the wood carving of the  "see no evil, hear no evil, speak no evil" monkeys -- the famous Three Wise Monkeys. There are around eight panels with wood carving of monkeys in various pose around the stable building but these three monkeys are the most talked about and everybody knows them. The photo of the three wise monkeys or sanzaru was taken almost 20 years ago during a one day tour to Nikko on a Saturday. The weather was really bad on that day. All traffic and tour buses going to the Nikko Toshogu Shrine were stopped by the traffic police for almost 2 hours due to heavy fogs and low visibility. When we arrived at the Nikko Toshogu shrine our tour leader was in...

Panorama with Autostitch

Image
Panorama photo is nothing new to us. In fact we were making panorama shots since the film day. That was rather primitive back then.  What we did was we pan the camera as we took several photos of a scene each with a different angle. When the film is processed and printed we stack and line up the prints to form a panorama of the scene. When 35mm film scanner became affordable we made a scan of the panorama images from our 35mm negative.  After that we stitched the panorama photos together from the scan images manually with a free software suit called Panorama Tools . The process was time consuming and slow but nevertheless we had fun and enjoyed taking and stitching panorama photos. A 3 photos panorama stitch of the Pavilion dragon taken with the Olympus Pen Lite E-PL2. Camera set to A mode ISO 200 F/3.5 1/80s and the M.Zuiko 14-42mm F/3.5-5.6 II zoom is set at 14mm. Today all modern digital cameras have built-in panorama mode and some of ...

Viva Home Shopping Mall Dragon Year Decoration

Image
We were on the way home after one of our Chinese new year visiting when my wife suggested dropping by Viva Home Shopping Mall. Viva Mall, previously known as Plaza UE3, is situated along Jalan Loke Yew.  Despite Plaza UE3 Mall's location on such a busy highway within the vicinity of Kuala Lumpur, for years this plaza had never really flourished as a shopping mall. Not many people knew about Plaza UE3 then and probably few could even remember such a shopping mall now. Kha Seng Group took over Plaza UE3 a few years back and gave it a new makeover and re-branded it as Viva Home Shopping Mall. It was reopen on April 2011 after almost one year of renovation.  Our first visit to this "new"  Viva Home Mall was around May last year and had not stepped foot there since. Today we decided to spend our afternoon at Viva Home Shopping Mall .  As its name says, Viva Home Mall wants to re-brand itself as a one-stop shopping centre for the home owners with products rang...